
SAM Broadcaster Setup
Configure SAM Broadcaster to send your stream to Lightman Streams.
Prefer video? Watch the SAM Broadcaster tutorial on YouTube.
Before you start
You'll need your Stream Info notecard, delivered in-world when you rented your plan. The fields you'll copy from it are HOST/IP, PORT, and PASSWORD. (If you're a live DJ connecting to someone else's AUTO-DJ station, use the credentials they gave you instead.)
Three things go wrong more often than anything else:
- Extra spaces from copy/paste. Double-click the value to select it cleanly. If you drag to select, you can grab a leading or trailing space without seeing it, and the connection silently fails.
- HOST/IP format. Use the address exactly as written, just
live.xxx.lightmanstreams.com. Don't addhttp://in front, don't add:PORTat the end (the port goes in its own field), and don't paste the in-world Land URL. - Password length. S Plan and M Plan passwords are always 6 characters. L Plan passwords are always 8 characters. AUTO-DJ live DJ passwords have no fixed length. If your S or L Plan password doesn't match the expected length, you grabbed the wrong line from the notecard.
⚠️ S Plan users: Set bitrate to 192 kbps. Anything higher will fail to connect.
⚠️ Station Name is required. SHOUTcast rejects connections that don't send a name. In SAM, this is the Station Name field. Set it now and you avoid the most common cause of "won't connect".
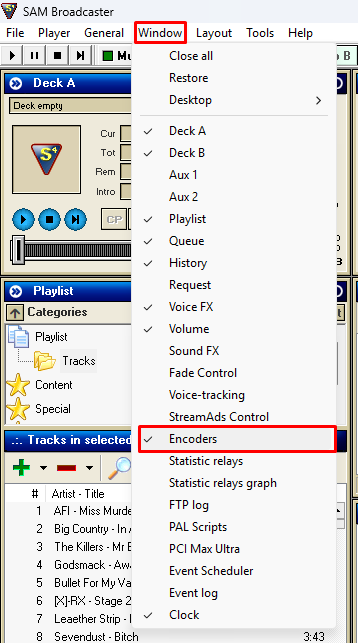
1. Open the Encoders window
In SAM Broadcaster, open the Window menu in the top bar and click Encoders. The Encoders window appears on your SAM desktop.
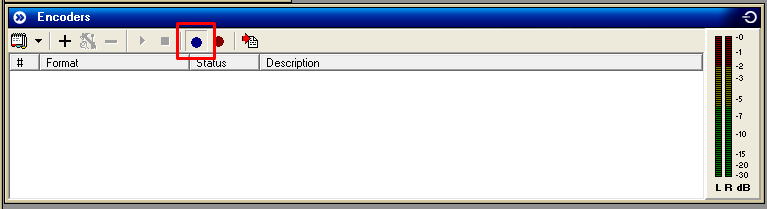
In the Encoders window, confirm that the input source dropdown (the blue circle, top of the window) is set to Select Audio DSP Pipeline as input source. If it's set to anything else, the stream won't carry the audio you expect.
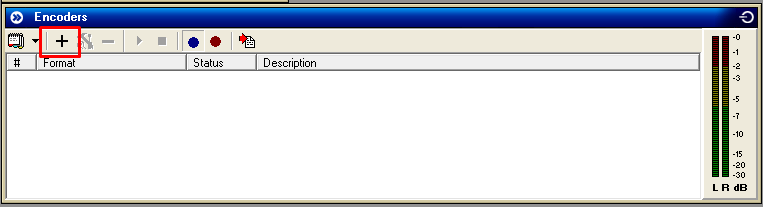
2. Add an encoder
In the Encoders window, click the + button to add a new encoder.
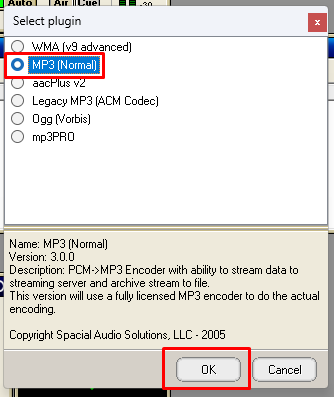
In the Select plugin dialog, choose MP3 (NORMAL) or LAME. Don't pick mp3PRO, it's limited and not recommended.
Click OK.
3. Set the output format
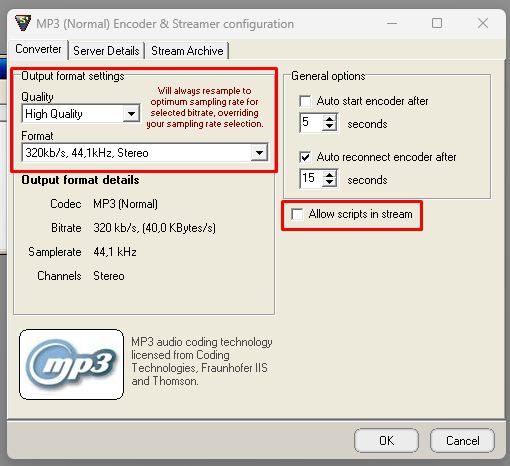
In the Encoder & Streamer configuration window, click the Converter tab.
Under Output format settings:
- Quality: High Quality
- Format:
MP3: 320kb/s, 44.1 kHz, Stereo(or192kb/sfor S Plan)
Also: untick Allow scripts in stream. Leaving it ticked can cause connection issues.
4. Enter your server details
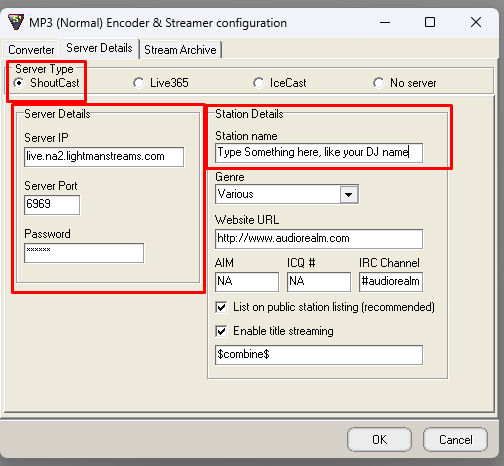
In the same window, click the Server Details tab.
- Server Type: ShoutCast (anything else won't work)
- Server IP: paste the HOST/IP from your notecard
- Server Port: paste the PORT from your notecard
- Password: paste the PASSWORD from your notecard (passwords are case-sensitive)
- Station Name: type any name (required, see warning above)
5. (Optional) SHOUTcast v2 fields
Recent SAM versions support SHOUTcast v2. If you're using a v2 server type, you'll see two extra fields:
- Username:
source - Stream ID (SID):
1
Both are typically optional and default values work for Lightman Streams. Only set them if your server type is SHOUTcast v2 and you're asked for them. If in doubt, leave them at the defaults.
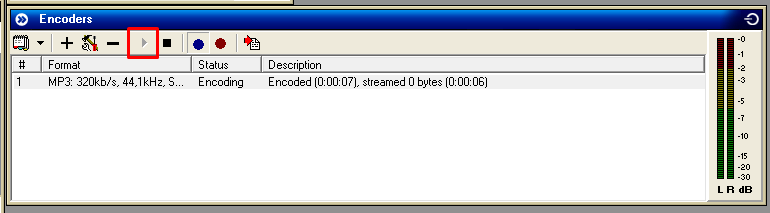
6. Start broadcasting
Back in the Encoders window, select the encoder you just created and click the Play button. You're live.
Microphone setup (optional)
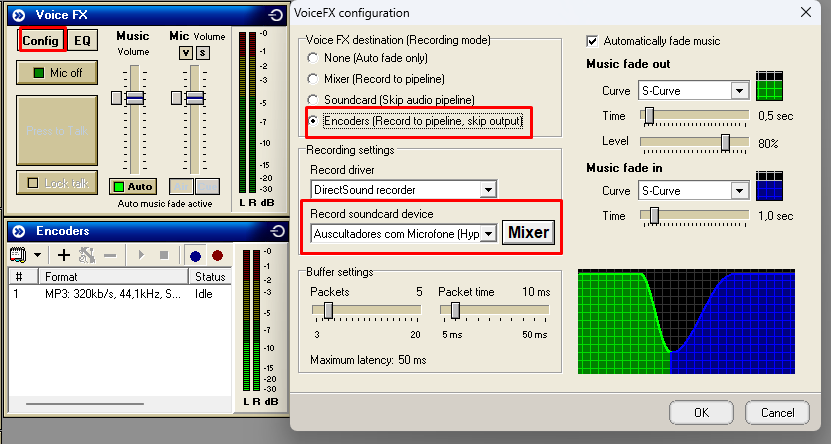
If you talk on air, route your mic into the stream before you go live:
- In the Voice FX box, with your mic muted, click Config.
- Set Voice FX Destination to Encoders.
- Under Recording Settings, open Record Soundcard Device and pick your microphone.
- Click OK, unmute, and hold Push to Talk. The meter beside the button should move when you speak.
If the meter doesn't move, see Microphone not working.
Common issues
- Frozen decks, mic not picking up, or music not going out? See SAM Broadcaster Common Issues.
- Connection rejected? See SHOUTcast Connection Issues.
- Stream drops mid-broadcast? See Stream Cuts Out.
- Stream sounds bad? See Audio Sounds Bad.
- Status page says "requires registration"? See Listing Status: Private.
Still stuck?
Reach out and we'll help you get unstuck.